supercrsky
- 浏览: 207365 次
- 性别:

- 来自: 北京
-

最新评论
-
z390174504:
不错,非常易懂
Builder设计模式的学习 -
daly1987:
我觉得也应该写一个完整流程好一些啊
JSP实现点击链接后下载文件(相当于右键另存)功能 -
daly1987:
标记一下
JSP实现点击链接后下载文件(相当于右键另存)功能 -
younglibin:
文章浅显易懂 很好 谢谢 学习了!
Builder设计模式的学习 -
younglibin:
其实 我对这个什么设计模式 一直非常迷糊,最近有兴趣学习学习! ...
Builder设计模式的学习
Flex3与BlazeDS HelloWorld 详解


 }
} }
}


相关推荐
flex3不能直接与服务器资源进行交换,借助BlazeDS 工具达到,flex3与服务器资源进行交换的目的
NULL 博文链接:https://zpap.iteye.com/blog/519325
前言:本讲是继【第三讲:WEB项目-集成Flex3+BlazeDS3.2+Spring2.5.6】后,介绍另外一种集成方式; 集成方式二:采用Spring侦听配置模式 目标:实现集成方式二 优点: 1、一个应用可以满足多种请求 2、易于集成...
Flex技术本身和Java就有很强的关联性,它提供了一个基于Eclipse的IDE和BlazeDS.BlazeDS是个基于服务端的Java远程调用和Web消息的一个开源的技术。有许多应用都是以Java为后端处理的。Flex用于前端。由于Java和Flex...
前言:本讲是在【第三讲:WEB项目-集成Flex3+BlazeDS3.2+Spring2.5.6】方式二的基础上添加iBatis,此次集成其实质是Spring与iBatis的整合而已 目标:WEB项目-集成Flex3+BlazeDS3.2+Spring2.5.6+iBatis2.3.4 再需...
前言:本讲是在【第四讲:WEB项目-集成Flex3+BlazeDS3.2+Spring2.5.6+iBatis2.3.4】的基础上添加iBatis,此次集成其实质是Spring与Struts2的整合而已 目标:WEB项目-集成Flex3+BlazeDS3.2+Spring2.5.6+iBatis2.3.4+...
flex与java通过BlazeDs进行交互
Flex 应用,BlazeDS通信,Flex 应用,BlazeDS通信
Flex与Java通信采用blazeDS的方式的例子,源程序,helloworld
該文檔提供了MyEclipse_8.5_flex4+Blazeds配置的整個過程,文檔中包括文字和圖片,形象生動
Myeclipse6.5+flex3+Blazeds+spring+hibernate完美整合,写的非常详细
flex+java+blazeds配置最终版
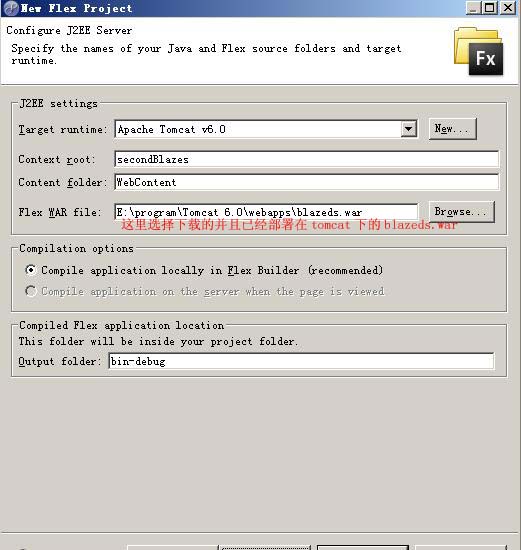
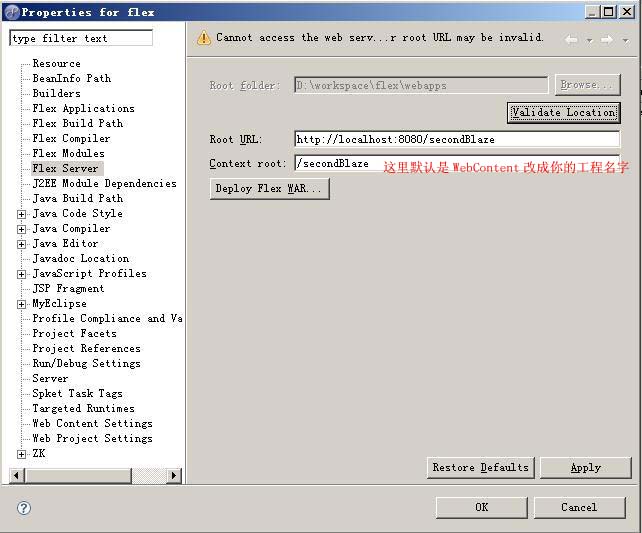
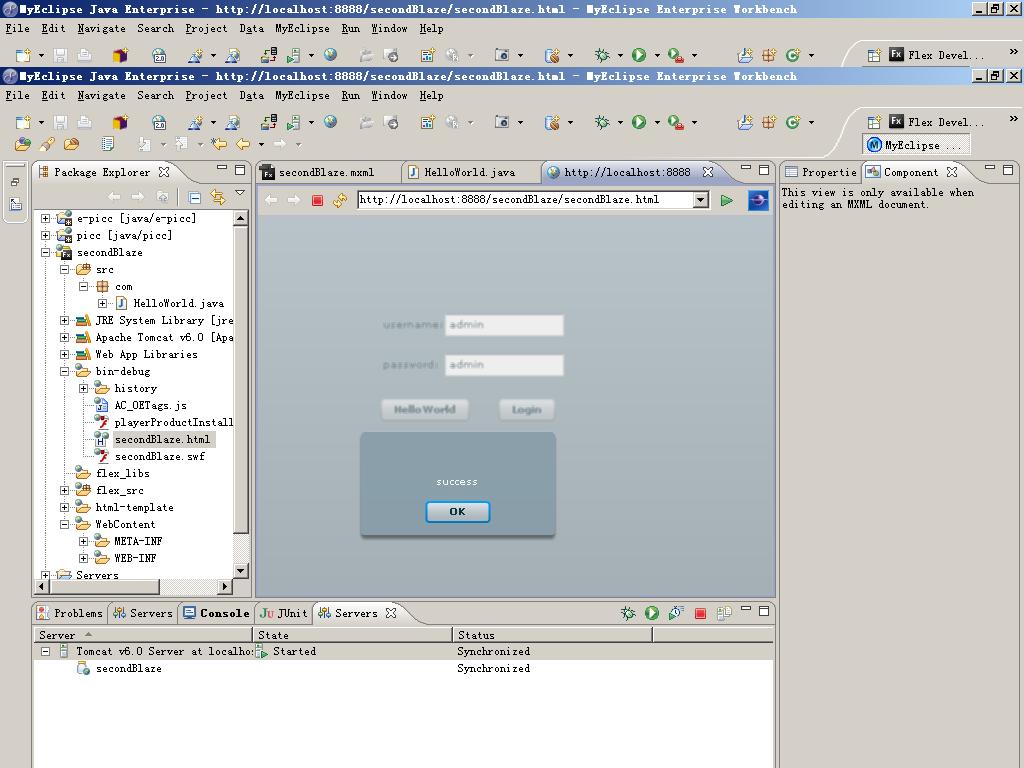
折腾了一周的时间想做个flex+java的helloworld例子,可是怎么都运行不出来,今天终于运行出来了。 总结,共有一下几种方法: 1,flex项目和web项目在同一项目。 2,flex项目和web项目为两个项目,进行交互。 ...
BlazeDS配置指南 tomcat安装 xml配置 flex与blazeDs
Flex4+BlazeDS整合 项目源码
本文档阐述了BlazeDS整合Flex示例,包括开发环境、开发依赖库、创建Java工程、Flex客户端程序
WEB项目-集成Flex3_BlazeDS3[1].2_Spring2.5.6_iBatis2.3.4_Struts2.1.8
原创作品手录 前言:本讲是在【第一讲:WEB项目集成Flex3功能】的基础上添加BlazeDS 目标:实现Flex通过BlazeDS与后端service方法通信《采用RPC模式的messaging》
用一个HelloWorld例子手把手教会你使用FLEX BlazeDS